Category Archives: Customs

Shrapnel – My first custom Transformer

Shrapnel - Robot mode (custom)

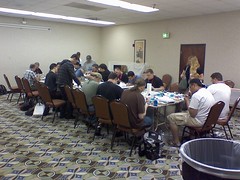
Back in December 2009, I was fortunate enough to procure an Iwata 0.2mm airbrush, lots of supplies, a medium sized air compressor, and pretty much every Createx acrylic paint currently available (thanks Jessica). The point of getting the airbrush was because I had been talking about making my own custom Transformers. I had made the one at Botcon, picked up a couple of duplicate figures intended as customs, and I eventually wanted to make an orange Aveo Transformer to match my real car. So I now have an airbrush in my possession and toys to customize.

I originally played with the airbrush shortly after getting the set, but ended up just being frustrated. Using some random small Venom action figure from Goodwill, I tried repainting it red to redeco him as Carnage. The paint didn’t flow smoothly, it globbed up, the paint flaked when touched, and the pinpoint detail the 0.2mm was supposed to have just wasn’t there. It was not a great first impression.

Discouraged, I put it away for several months.

Then last month, I felt like trying it again. I hadn’t been creative in a while and it felt like a good time to give it another whack.

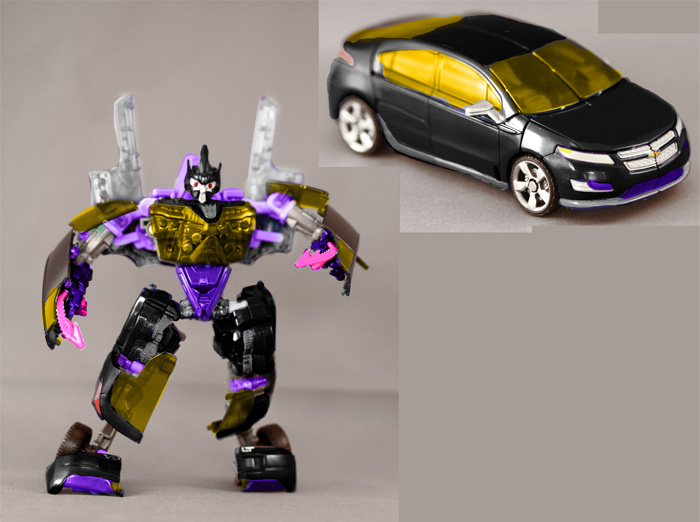
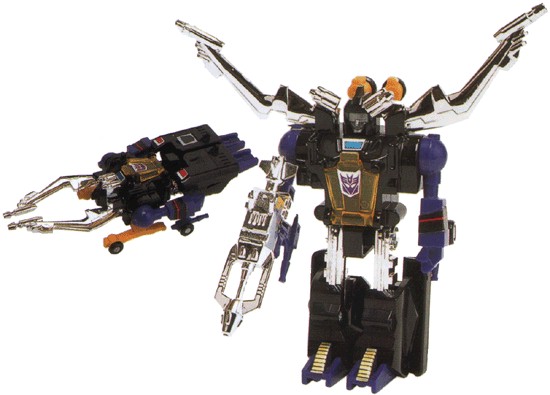
So at the same time I received the airbrush, I had received some extra Revenge of the Fallen Transformers meant for customizing tests. Using three of those figures, I had it in my mind to re-purpose them as movie-themed InsecticonsShrapnel, Kickback, and Bombshell. All deluxe class vehicles with similar color schemes.

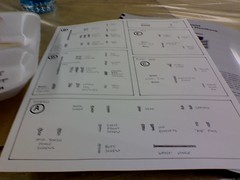
I started by digibashing the figures. Using some macro photographs I took of the toys, I loaded up Photoshop and recolored the original plastics. Using photos of the original G1 toys, photos of the Robot Heroes, cartoon screenshots, and other images I tried to match characteristic details of each character in their redeco. I didn’t spend a whole lot of time getting the details exactly perfect; as I just wanted a base from which to work on with the actual paint. I tried to use colors that matched paints I already had so I wouldn’t have to mix unique colors. I thought this digibashing process would take quite a while, but I cranked all three rough redecos out in about 2 hours.

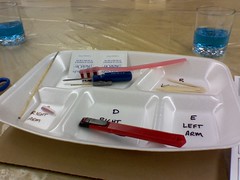
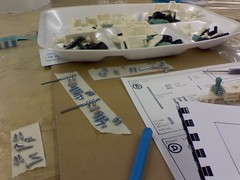
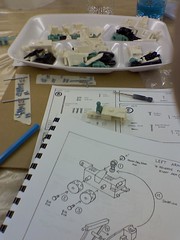
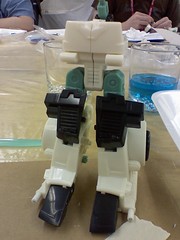
The next step was choosing which one to start with, and then taking it apart. Jolt, the basis for Shrapnel, seemed like a good starting point with a larger number of screws versus pins. Pins can be a pain to remove and put back, so I saved the other two figures for later. Piece by piece I disassembled Jolt into as many parts as I could, all along keeping track of each screw and where they went by taping them to sticky notes. Screw lengths and widths are not uniform across the figure as I found out at Botcon. I had to make sure each screw went back where in came. Each part was then separated into separate bowls that were grouped by color.

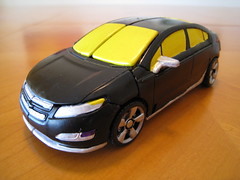
I decided to start with the pearlescent yellow that was for the windows to mimic the yellow/gold plastic on the original. I knew I wouldn’t be able to keep the translucency of the blue windows, but I figured the paint would look good against the other colors. The initial bits of yellow would also not need to be masked off making it a good starting point. I also tried my hand at the pearlescent silver bits with his pincers on his back.

Unfortunately as I came to find out, the non-opaque paints I have do not cover well nor spread well. I had not figured out the correct mixture of paint to illustration base at this point and so I slathered each piece just trying to get it to coat. The paint was thick and much of it was wasted. I did not start with an opaque base and so most of the paint just didn’t stick. I also had not sanded each piece prior.

I also was finding that the airbrush was clogging a lot. Constant cleaning and disassembling of the airbrush were common occurrences. In addition, I was quickly running out of the small bottle of the airbrush cleaner I had. Halfway through the painting process while trying to clean the brush, I ended up stripping the threads off the 0.2mm nozzle. That put a delay in the customizing, after which Jessica headed to Phoenix and nicely picked up both a replacement 0.2mm nozzle and a 0.3mm nozzle (which works via some slight jerry-rigging). That was an additional $80 I had not planned on…

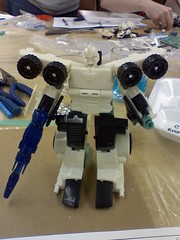
I fumbled through the rest of the colors over the span of 2 weeks, finding better paint mix ratios and seeing that the opaque colors like white, black, and dark colors don’t need much spraying before seeing results. I tested my hand at masking, unfortunately finding that some pieces need to be perfect and ended up with some bleeding such as black streaks in the yellow. Also, the Createx paints don’t cure unless they are heated with a air dryer or heat gun. Even after that they still show fingerprints and smudges. Next time I will try actually using the clear coats intended for finished pieces.

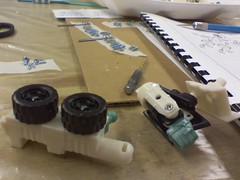
So I had all the pieces mostly painted, they had been heat cured, and I felt anxious to get the figure together. Seeing it all in parts strewn across the table kept irking me.

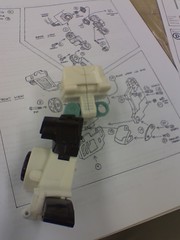
Starting with his arms, I quickly found out that because I had painted so thick and/or the paint wasn’t fully cured, parts which rubbed or twisted against others rubbed the paint off in spots. Ball and swivel joints rubbed down to their base plastics which was a bright electric blue. Furthermore I found that if pegs had been painted, the pieces wouldn’t fit together cleanly or smoothly. I ended up breaking the base peg on his left knee trying to dry fit the part. At least the screw and other parts that followed still keep him together. On later pieces I ended up scraping away unnecessary paint on these pegs with a exacto knife so the pieces fit better.

Shrapnel - Car mode (custom)
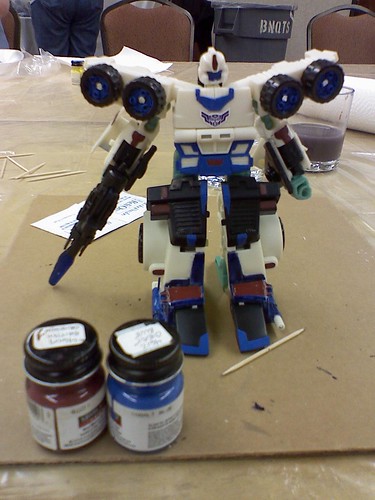
Once fully together, I started to paint the small details. Red eyes, detail highlights, headlights, bumper trim, and the like.

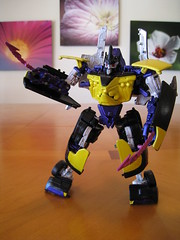
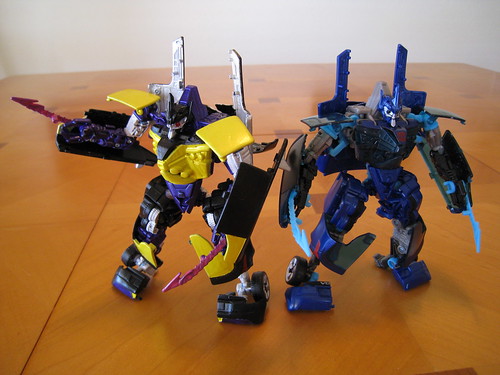
Transforming Shrapnel, or even moving some joints, is not as smooth as I would have hoped. His parts are very tight due to the paint, and he is quite hard to actually get transformed between modes. In addition, the colors that I had don’t quite match up to what I had planned. The yellow is not quite orange enough, the purple is a bit dark, and the silver is just a bit too white (even though I can’t quite get the chromed look with just paint).

But I can now honestly say I’m glad to have this first self-designed custom Transformer completed. He does look quite nice on my desk even with his imperfections.

Shrapnel and Jolt - Robot modes

The question now is when I’ll get to the other two Insections I had digibashed. I must admit I’m a bit burned out at the moment as the process wasn’t what I consider fun. Also, do I make changes to the coloring to match what I wished the scheme was or keep the other two the same to match how Shrapnel turned out?

I guess we’ll see if and when I get to Kickback and Bombshell.

BotCon 09 Customizing Class

Back to the BotCon 09 posts…

After picking up my boxed set, the next event I had scheduled was the all day Thursday customizing class. I didn’t quite know what to expect with the class, but I knew that they only had 2 classes the entire ‘con with 50 seats each. I had heard that they filled up immediately, and so if you had any inkling of taking one of the classes you needed to jump at the opportunity.

The class sounded like a good idea, and so I tried to reserve my seat when I faxed in my registration. As it happened, I was quick enough and luckily I got in under the cutoff for the Thursday class.

Customizing class setup Part tray and tools Customizing class part sheet

The class was held at the Colorado room of the Hilton Pasadena. The room was somewhat small and had several long tables pushed together, which had been draped in plastic. In front of each seat was a foam tray with a couple of tools inside. There was also a parts guide and a small booklet with information about the class and the character we would be building.

As it turned out, the toy we were going to construct was Shattered Glass Thunder Clash. Thunder Clash was one of the exclusive boxed set toys from this year based on the Energon Rodimus mold. Shattered Glass is the universe created by the Transformers Collectors Club that is essentially the mirror universe of the Transformers with Evil Autobots and Good Decepticons. Several of the Rodimus toys and completed SG Thunder Clash toys were also sitting on the table for reference.

I was kind of disappointed when I saw Thunder Clash sitting on the tables, as I was not a fan on this toy from the pre-release photographs. I also wasn’t a fan of the character, and wished it might have been any of the other members of the exclusive toys. However, we were going to be making SG Thunder Clashes and so therefore so would I.

Customizing class partsShortly after everyone had arrived for the 9am start; the host for the class, Shawn Tessman, introduced himself and discussed what we’d be doing. He and other volunteers then handed out bags (containing even more bags) with all the toy parts still on their plastic sheets. We had to then take each sheet and cut/twist off each part and sort them into quadrants on the foam tray. We would also need to trim any flashing still left on each part so they could fit together snugly when completed.

There was one slight hiccup that they caught during Wednesday’s class and it seemed some bags had 4 of a part, which other bags had 4 of another part. So once we got the parts untwisted, we simply traded 2 of that part with our neighbor for 2 of their part.

The parts themselves were the exact same unpainted mold as Wings of Honor Thunderclash, and it was quite interesting just how plain or “naked” this toy looked. Paint applications really are a key part of each figure.

Customizing class partsThe next step was the daunting task of separating out all the screws, pins, and springs. They recommended that you lay down strips of masking tape to group each set of pins together. Differences between the lengths/widths of each pin were very hard to determine and the photocopied guide sheet wasn’t perfect (nor could you expect it to be). This by far took the longest and even then I didn’t match them up perfectly as I came to find out.

So with all the prep work done, it was time to start building. Each quadrant of the tray was a different body part such as a left leg, right arm, torso, etc. In the instruction booklet, each body part had an exploded view showing each individual part, what order to put them together, and what pin or screw you’d need.

In some places where there was just a pin, or a larger screw, we’d need to bore out the pin hole with a mini-borer. Sometimes the parts would be too tight if we didn’t clear out the holes, and so we needed to make sure parts could rotate correctly and not have stress fractures.

Customizing class diagram and partsSlowly my first part, the left arm, came together. It took a little thinking to get started as you had to make sure you wouldn’t screw up. Lots of parts were pressure fitted once combined and so you had to make sure it was right. In addition, some parts needed to be pressed together with a hand-held leather punch (like pins) or hammered with a setting pin at Shawn’s desk.

I kept plugging away at parts and eventually hit on my first snag. I started to screw together one of the hands, but had placed the wrong fist on that hand. In my attempt to fix this I stripped my first screw, and realized that you really did have to put this together correctly the first time. Regardless, arms, hands, and legs were coming together.

The process began picking up speed as I got comfortable with how these toys are built. The construction did start becoming a bit more complicated, especially in areas like the torso where the Powerlinx feature was.

Arm and hand Torso and left leg Lower body

There were a few more missteps along the way: forgotten parts, screws that were too big, over tightening parts, taking things apart to make sure they were right, etc. An example of one of those errors is in one of the pictures above (the one with two legs). You can see a small dimple at the top of his left leg that isn’t on his right leg. That dimple was created by using a screw that was too long and screwing it too far. Doing so made the screw tip poke through and almost push through his left hip. I wasn’t alone with having errors like this, so I don’t feel too bad.

Naked Shattered Glass Thunderclash
The class had started at 9am and finally by a little after 1pm I had completed the base figure. I hadn’t taken a break for lunch (knowing that my time was limited) and it still took 4 hours to build this guy. I really didn’t think it would take that long, and I had expected to spend most of my time painting and tweaking the figure when I had initially signed up for the class.

However now that I was done building, it was time to paint.

The only set of personal tools I had brought were my own paintbrushes, and I’m glad I did. We were only provided with one to use (along with some toothpicks) and I wanted to have a few more options. We had access to lots of enamel paints, some metallic but most were flats. An airbrush area was also available, which I ended up using later.

I didn’t have any idea what to go with as far as a color scheme. It was suggested to just enhance his normal non-painted colors since the Wings of Honor Thunder Clash had lots of paint apps, and so by leaving him mostly cream/white would make him look evil. I instead decided to go with navy blues and burgundy red colors, with hits of purple.

Painting the figure was a lot harder than I had anticipated. The enamels were pretty thick and weren’t the easiest to get detail work with (at least in the short time remaining). We could use toothpicks to drop bits of paint into spaces (like the face) and it would fill in the crevices. I did my best with what I thought would work. I was happy with my results for the most part, but I had wished I had not used a metallic purple paint. This particular paint was very watery and so did not cover well and also dripped. The clean lines I had envisioned ended up being leaky and streaked. Oh well.

I had used the airbrush station as well. Like most of the others, we painted his traditionally clear blue weapon a flat black. With Shawn’s help I was able to get full coverage easily and I was happy how his gun looked in the end.

By a little after 3pm I had finished painting my personal customized Shattered Glass Thunder Clash. The volunteers had to go set up for that evening’s club store, and so the class was drawing to a close. I packed up my stuff, thanked the crew, and headed back to the room.

Painted Shattered Glass Thunder Clash

I would later do some additional adjustments once I got back home; like fixing his left hand, tightening screws, and adding additional stickers. However, it still had taken me a whole day to complete a single Transformer.

BotCon toy count to date: 21